
I took what probably could have been a very simple job and turned it into an ordeal. That said, I learned a ton. In principle, plumbing isn’t that complicated. In practice, the crazy mix of different hardware from different vendors and generations, coupled with some of the basic engineering constraints (galvanic corrosion, the “water hammer” effect) made for an interesting, if frustrating (and expensive), repair.
Te recap: One of the pumps in my Whale double-stack fresh water system failed. Whale does not sell replacement pumps. They did send me a replacement diaphragm, but the motor itself was damaged due to the water ingress. I ordered a Whale Universal Pump, but failed to notice the amp draw (12A at max flow). The original pumps are both 10A, which fit on the 20A breaker and wiring. With the potential draw of 22A, breaker trips were likely. So, I skipped right to the much nicer (much more expensive), impeller-based, Marco variable-speed pump.
Spoiler: It’s in and working. This was the dry-fit before I cleaned everything up. It’s way quieter than a diaphragm pump.
Job Notes
- The DC wire is 5.5mm on a 20A breaker. This, on it’s own, confused me, because 5.5mm isn’t even an option in any of the tools I use. I found a useful chart here, which seems to match up with AWG 10. I estimate it’s a 20′ run from the panel, which shows a 4-5% voltage drop based on my wire size app. If there is voltage drop, it’s too low to be detected by my Fluke meter, which read 13.7 – same as at the battery shunt. The Marco draws 20A at max load (same as the old Whale double-stack), so I should be good.
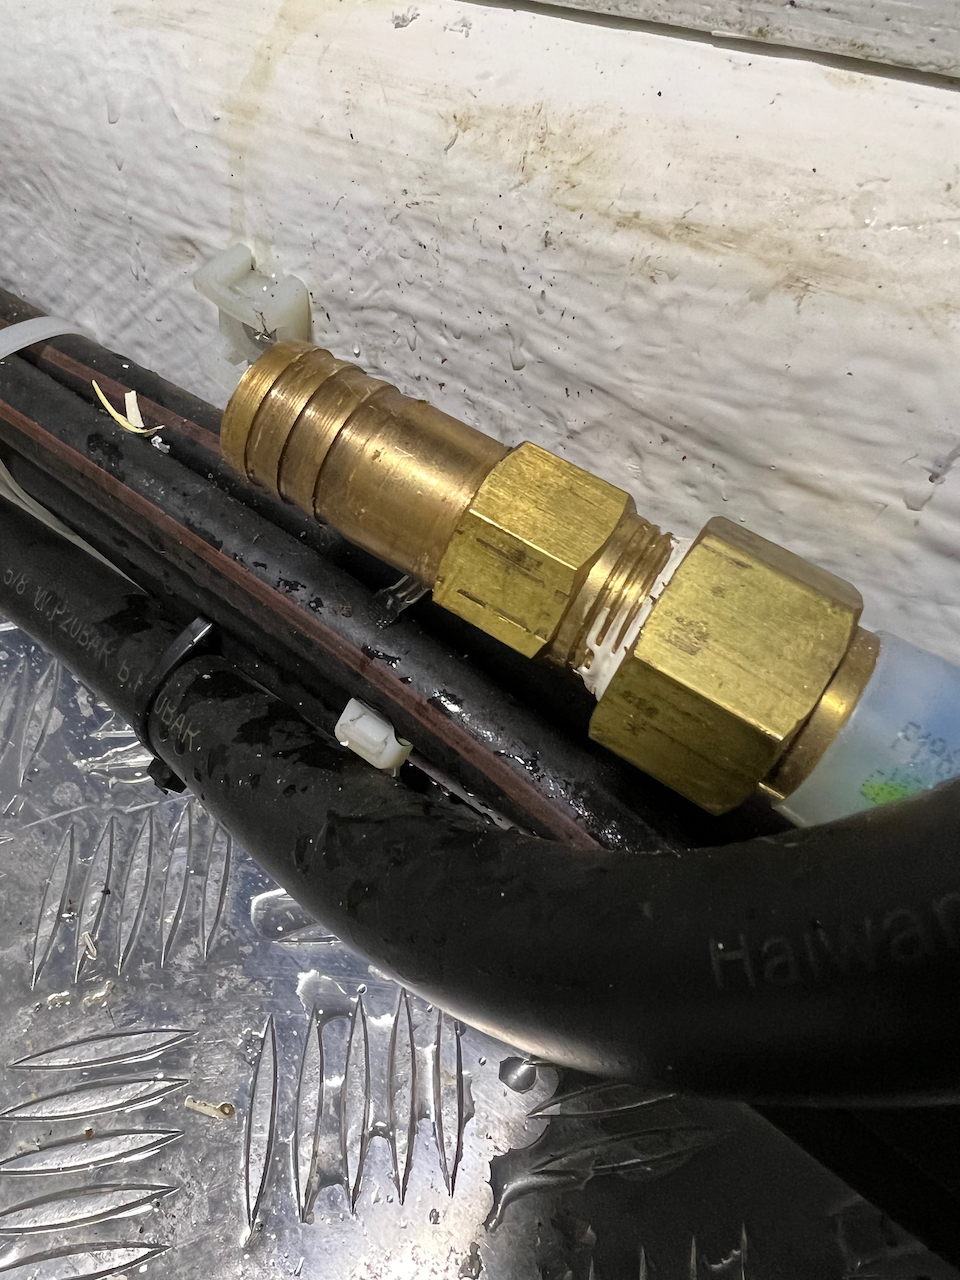
- I’d originally planned on extending the PEX-A to fit the new unit – and bought a bunch of fittings and tools. But, flexible hose is way easier to work with, and I already had PEX-to-3/4″ hose barbs installed. So I found some pressure-rated flexible hose that was incredibly easy to work with. Note that it needs to be rated for both positive and negative pressure, since I’m using it on both sides of the pump. Some hose is rated against bursting, but could still collapse. This stuff has a coil of wire to keep it from collapsing under vacuum.
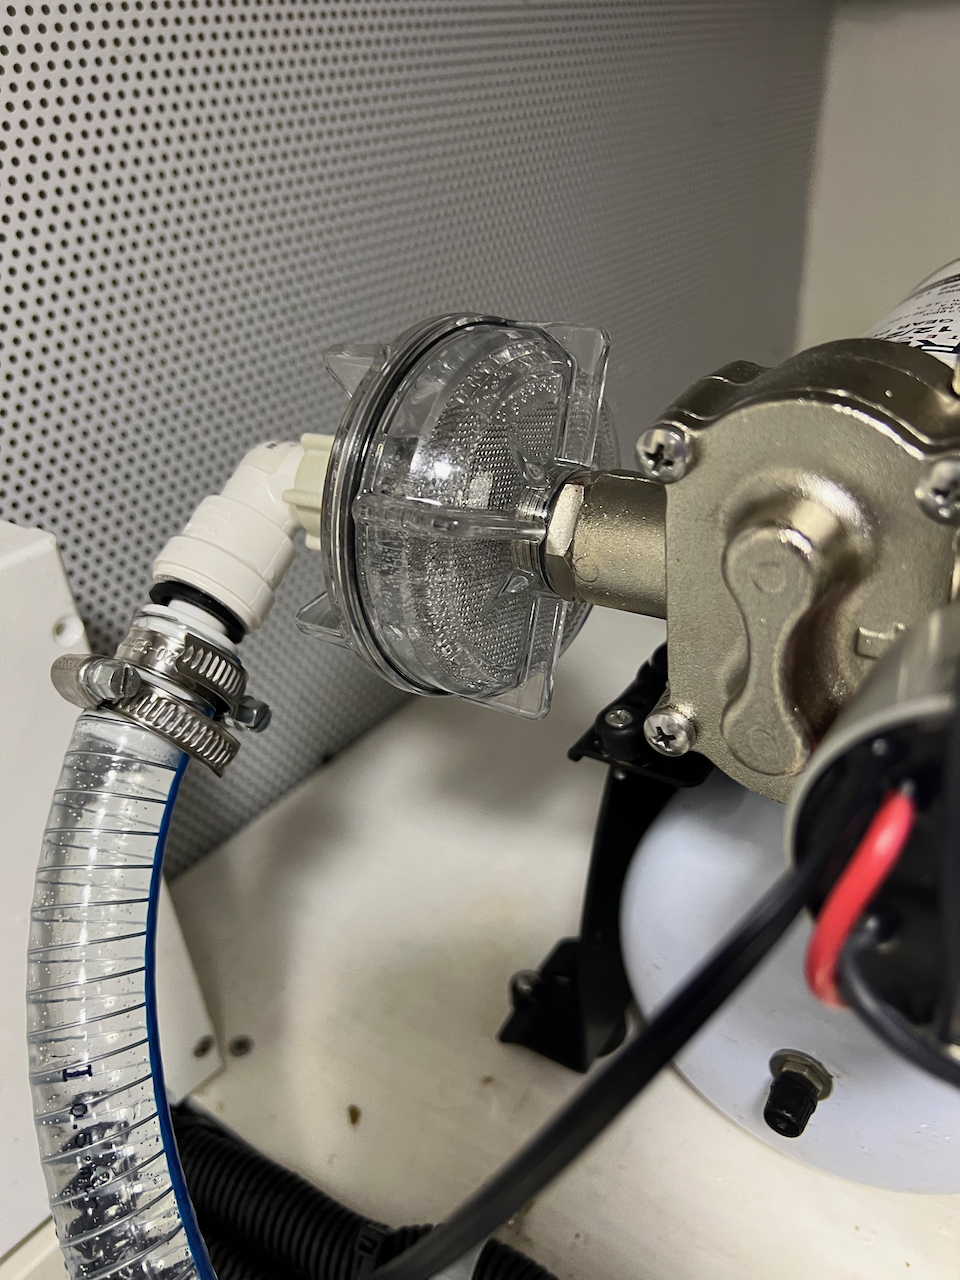
- The pump housing is stainless steel, which should not be directly connected to brass. Thus began a mad search for fittings. I bought several from Whale and Seatec, as well as PVC from Home Depot. The pump came with three adapters, which turned out to be from straight (NPS on the pump housing) to tapered (NPT – to work with regular pipe). NPT vs. NPS was one of the first big things I learned on this job. The NPS fittings have a gasket/o-ring to keep the seal.
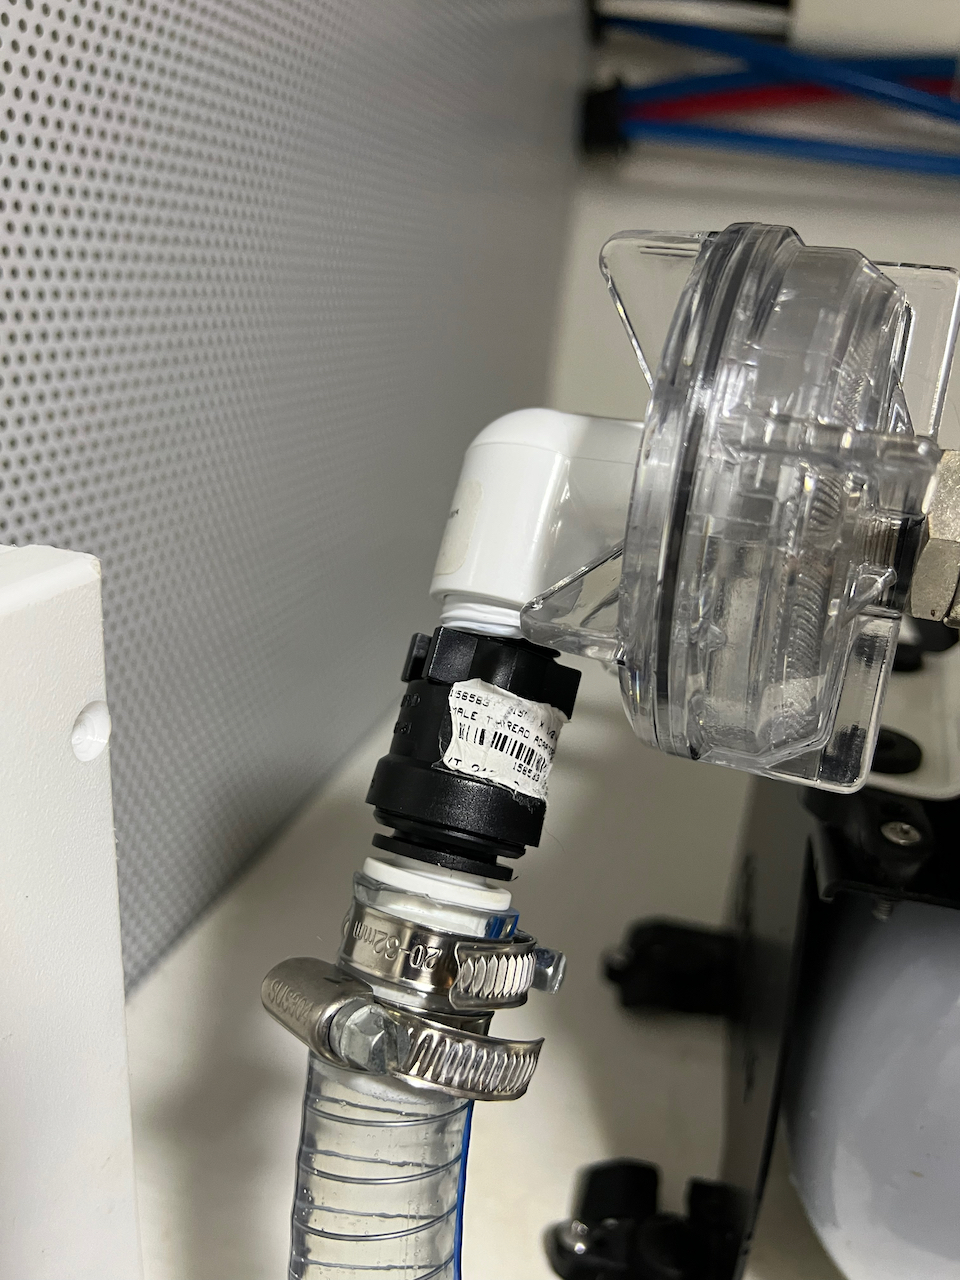
- I wanted quick-connect fittings to make maintenance easier. It turns out that not all fittings work together, even if they share measurements. Whale makes a line of quick-connect fittings, but there aren’t that many options for compatibility. Fisheries carries a ton of them, but it’s not clear how they all fit together. I originally installed the light-gray components, which worked, but were incorrectly sized for the 15mm hose barbs. In the end, I use the proper 1/2″ to 15mm quick connect pieces. At first I was worried that I was putting an NPS female onto an NPT male, but apparently these particular fittings allow that. I got lucky.
- Just connecting to the strainer required using some PVC. The strainer has a short, straight thread which requires the Marco stainless adapter (the receptacle is plastic and too short to get a seal against anything else). My first build had a very slow leak that caused the pump to lose prime after a while. I was able to fix this by going NPT/NPS stainless adapter to 90 degree female-female PVC to 1/2″-to-15mm quick connector.
- The old assembly used a bunch of what I assume was 4200 to seal the fittings, but that’s totally overkill. I used teflon tape on the threads and two stainless steel host clamps for the barbs and it worked out fine.
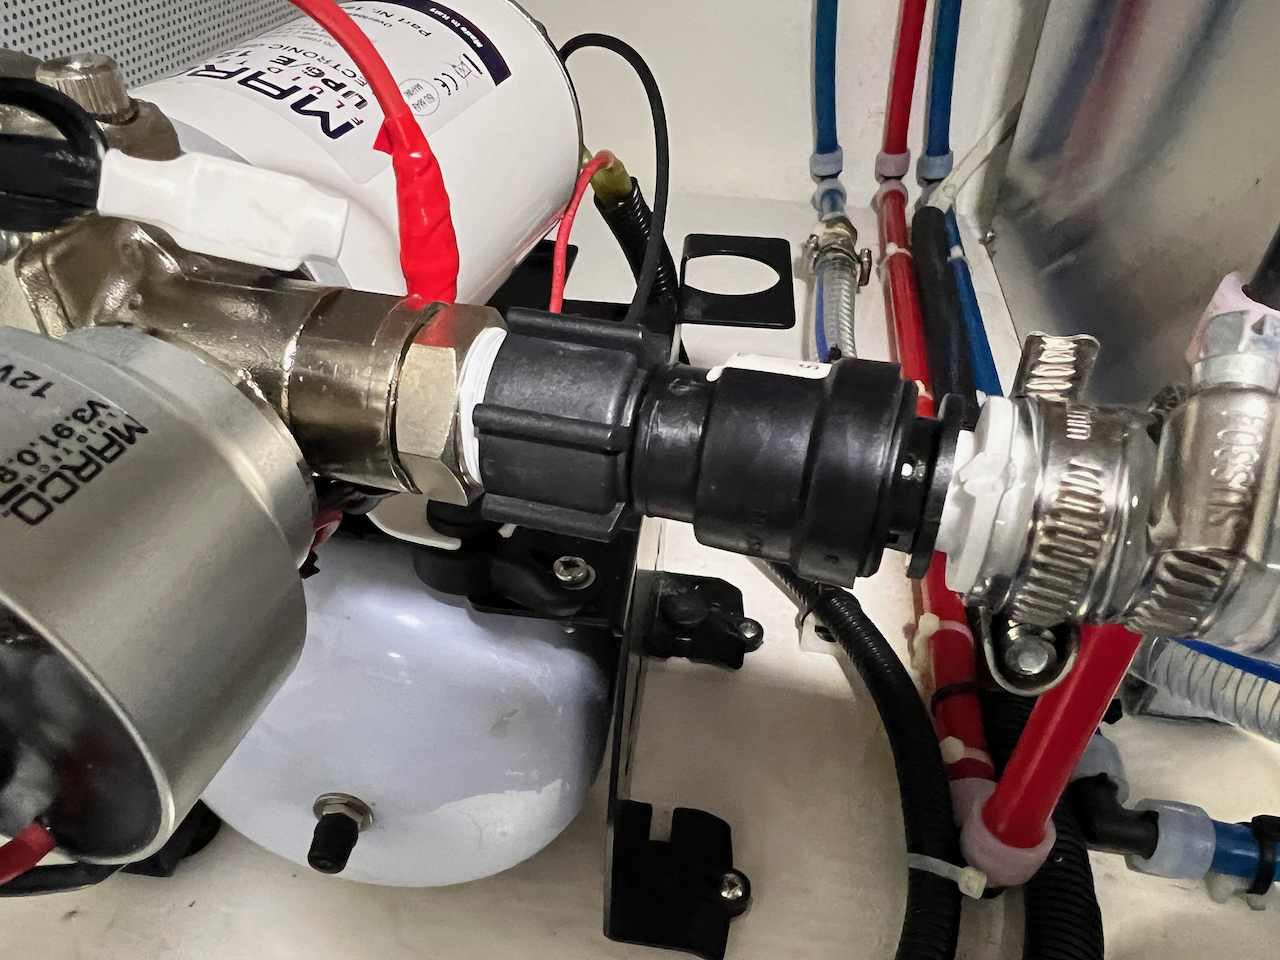
- In the interest of maintaining compatibility (I still have the new Whale Universal pump as well as one of the original Whale 3.2 gpm pumps for spares), I mounted the Marco on top of the Whale frame using the adjustable rubber feet from the Marco pumps. I had intended to include the accumulator tank, but I didn’t have enough hose. The Marco is a variable speed pump that doesn’t technically require an accumulator tank, but I thought it wouldn’t hurt and would make it easier to swap in a spare if necessary. After a closer read of the Marco manual, is says to only use an accumulator for a very short pipe run, but otherwise to avoid them.
- At first I couldn’t get the pump to prime, then I remembered the little bleeder bolt on top of the housing. Simple and elegant.
In the end, the installation is way simpler and the pump, so far, works incredibly well. It’s far more quiet than a diaphragm pump (we can’t even hear it if the engine room hatch is closed) and it seems to ramp up and down when taps are turned on and off without much lag. It’s also serviceable (the impeller is easy to access).
Measurements and parts:
- Boat Plumbing: PEX-A 1/2″
- Flexible water hose: 3/4″
- Pump housing: 1/2″ NPS (stainless)
- Pump adaptors: 1/2″ NPT (stainless)
- Quick-connect fittings: 15mm
Tank-to-pump: PEX A 1/2″ -> brass fitting -> 3/4″ flexible hose -> 3/4″ hose barb-to-15mm quick connect male -> 1/2″ NPS-to-15mm quick connect female adapter -> 1/2″ female-female PVC 90 degree elbow -> 1/2″ NPS-to-NPT stainless adapter -> Strainer -> NPS-NPS stainless adapter -> Pump
Pump-to-house: Pump -> 1/2″ NPS-to-NPT stainless adapter -> 1/2″ NPS-to-15mm quick connect female adapter -> 15mm-to-3/4″ hose barb adaptor -> 3/4″ flexible hose -> brass fitting -> 1/2 PEX-A


Looking at this build now, the ingress hose from the water tank is a bit short (putting tension on the fitting) and the output hose is too long. Also, i should see whether the black 1/2” to 15mm adapters come in a 90 degree elbow.