
With the weather dropping below freezing, we have kept the heater on with the thermostats set to 45 for the past couple of weeks. This morning, I noticed there was, again, no coolant in the overflow bottle (I last added some a few weeks ago). I added 1/2 a gallon and called ITR. They talked me through disassembling the unit and we found significant white residue in the burn chamber, a clear sign that coolant is getting in there. The only long-term solution is to replace the unit, since the pinhole(s) can’t be easily repaired (it’s a welded seam – I asked about using some kind of patch, but there’s open flame in there so it needs to be a real repair). ITR will replace the unit under warranty (even though it’s out of warranty, I have been working this issue with them for almost two years now). But, I don’t have a plan for who will do the replacement. I could probably figure it out, but I’d really rather have a professional handle it. I contacted North Pacific to get their take.
On the one hand, I’m super bummed this is a major repair. On the other, now I know how to take the unit apart, clean it, and put it back together again (it’s back up and running as I write this). Also, we can continue to use it and just add coolant every few weeks until we can figure out the replacement. So, we can still go on our winter trip to Alderbrook.


Job Notes
- The front cover of the little box that holds the fuel injector assembly (with the little round window) has a gasket that makes it stick to the box. It required some gentle prying to get off.
- The injector was covered with carbon and sticky diesel burn gunk. Cleaned it off.
- The fuel injector needs to be removed to access the burn chamber. The thumb screw should be pretty tight (ITR told me to use a pliers) since there is some vibration in the chamber and we don’t want that thing falling out.
- To move the injector out of the way, I had to disconnect the lower fuel hose. I believe this is the return hose, as there was very little fuel in there and tech support said I didn’t need to worry about priming it.
- The cable harness on the lower part of the box also needed to be removed – there’s a soft rubber collar that slips out of the slot.
- The igniter goes on the top of the assembly – it won’t work on the bottom. The assembler put marks on the pieces to make sure they have the correct orientation.
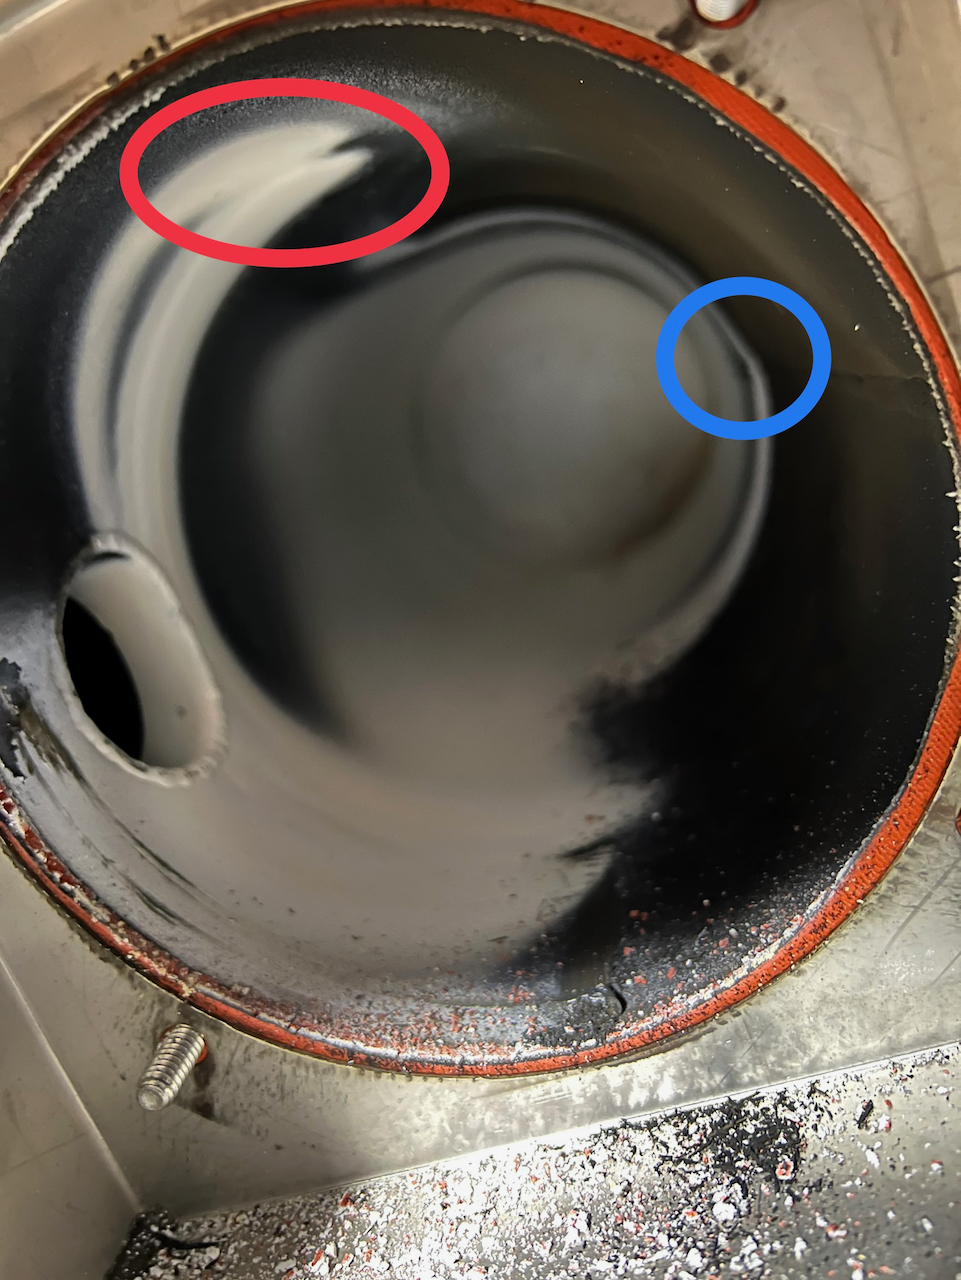
- ITR said I didn’t need to worry too much about cleaning out the burn chamber. The carbon build up is normal. I did clean up the little air redirect piece (can’t remember the name, first picture in the gallery above) as well as the injector.
- The red gasket on the burn chamber is worn and left particles when I removed the parts.